Today was a good day. We installed this in the dining room!
In March of last year we replaced the unfortunate chandelier that came with the house with a vintage red plastic saucer pendant…but then I immediately found something better. The You Make It Chandelier, designed by Lindsey Adelman, is really cool. The instructions to make it and a parts list are available for free on Lindsey Adelman’s site. That’s right—you make it yourself. It’s super easy to buy all the parts from Grand Brass Lamp Parts (I’ll talk about that in a minute) but—at least for me—it’s impossible to convince the person you live with to assemble it for you. Seven months after the parts arrived and seven months of asking “can we make the chandelier now?” I finally decided to just make it myself.
You set out all the parts, screw them all together, wire them—just follow the instructions, it’s sooooo easy! Er, not exactly.

All the other bloggers who’ve made this would have you believe it takes 55 minutes to assemble and 5 minutes to have it up on the ceiling. But here I was, six hours later, still at it:

For posterity and to potentially help some future person struggling with this here light, I’m going to share what I learned from assembling and wiring the chandelier—TWICE. If you’re not interested in the blood, sweat, and tears, feel free to scroll down to the bottom.
First thing I learned: After wiring the sockets it’s better to screw together an entire arm’s length of brass pieces before you attach the assembled arm to the socket—THEN run the wires through. Don’t run the wire and screw together the parts as you move along. Assemble then wire. The wires that come with the kit are super snug inside of the brass arms, and if you screw together the junction points while there are wires in there they twist up and the metal threads at the junctions can scrape their plastic coating. When I took apart my first assembly attempt some of the wires had been scraped just a little bit—there wasn’t copper sticking out or anything, but still it made me nervous enough to rewire the light. It not only seemed safer to screw the parts together and then feed the wires through, it was so much easier, especially in tight junctions like this (photo taken during Try #1):

I was having a hell of a time getting that bottom arm screwed in. It was much easier to attach it without the wires inside. When I assembled and wired the light for the second time, I replaced some of the Grand Brass wire with wires I picked up at RadioShack that was also 18 gauge and equal in specification, but for some reason looked and felt slightly thinner. It seemed to fit in the brass arms so much better.
I also had trouble with the friction swivel joints—the wires would get completely twisted when I screwed the parts together. For Try #2 I took a lot more care with these parts. I separated the joints, attached each half of the joints to the correct brass arms, then ran the wires through before assembling and closing the joints.

Second thing I learned: I should have been more thoughtful about the parts I ordered, instead of just ordering the pre-assembled kit of parts (but, you know, hindsight). The kit comes with parts that I didn’t use:
• the twin socket adapter and globe bulb—I didn’t like that the adapter stuck out beyond the brass socket cups so I ditched it, and the light bulb intended for it
• the gold cloth-covered wire, the plug, the 7 inch brass arm, and the male loop—I ended up using a 14 inch brass arm at the top, when I decided to hard-wire the light to the ceiling instead of swagging it
• electrical tape—a roll comes with the kit but we already had this on hand (we also had plenty of wire nuts, so I didn’t really need those either)
The parts I ordered later were:
• 14 inch brass arm (this length would depend on your own ceiling height and how low or high you want the light to hang; since it was going over our dining room table it was okay to hang it on the low side)
• 6 inch brass base, which I used as a canopy (Grand Brass part #BAFL06NW)
• 3/8 inch slip ring with side screws, to hold up the canopy (Grand Brass part #SR0-3/8)
Okay, enough shop talk, let’s put it up! At this point, Jamie decided to help out and wire the light to the ceiling. (Of course, after I had done all the hard work!) After turning off the breaker, we attached the fixture and—without screwing up the canopy—turned the breaker back on to test that the light worked alright. I stayed well away and closed my eyes, just in case.

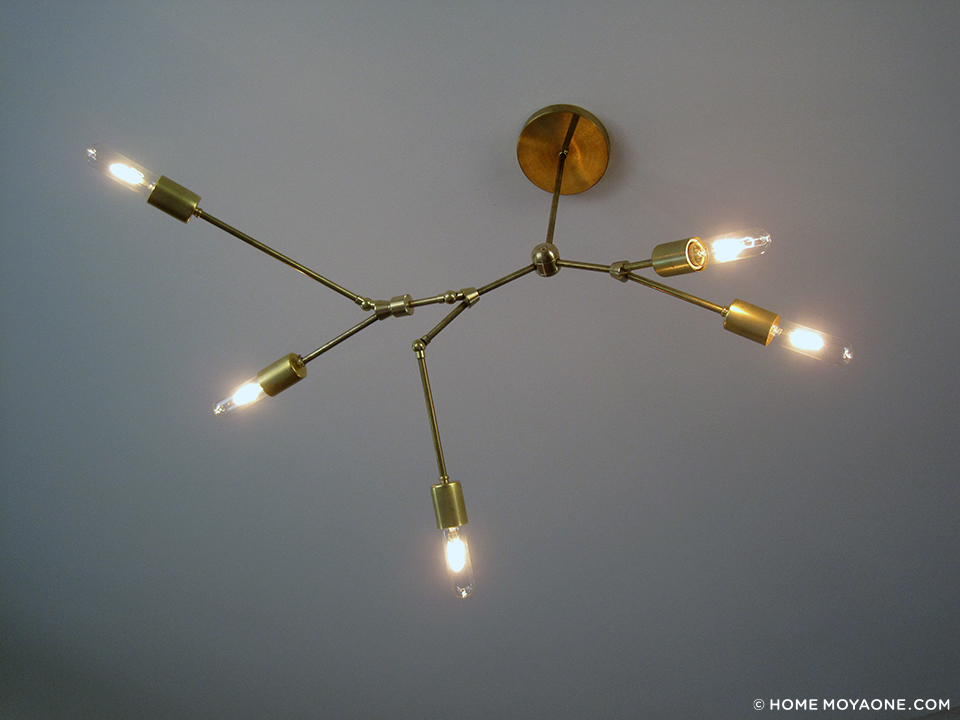
It worked! We screwed on the canopy, popped in all the bulbs, and here she is:

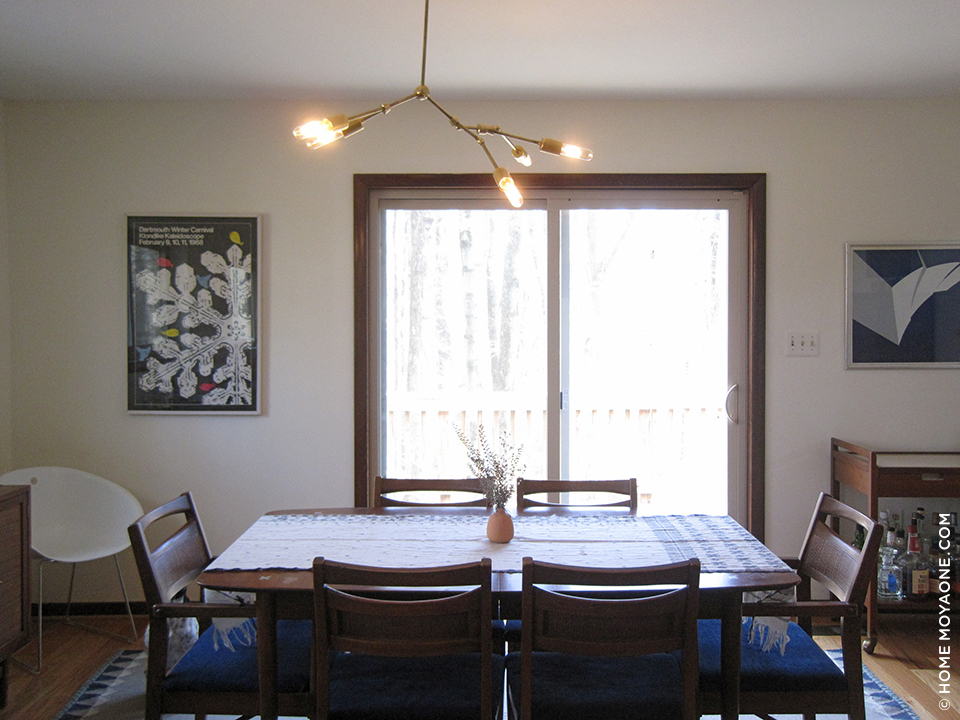
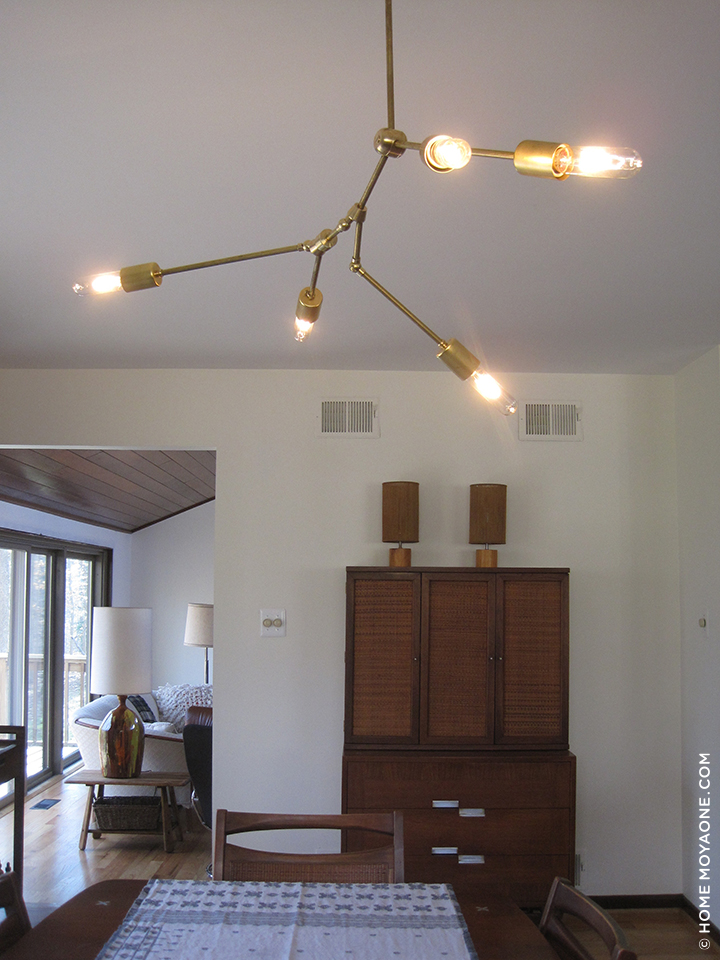
We love how it looks! The Edison style bulbs put out nice light and the brass ties in with some other accents we have in the room…

…and with the light fixtures we installed in the foyer! There are some more details I want to work out in the entrance, but until that happens here’s a sneak peek:

Brassy.

Thoughts?