We picked up our mid-century American of Martinsville dining room set (tallboy, credenza, bar cart, table, and chairs) at the small vintage shop Off Main (in Catonsville, Maryland) about a year ago when we were living in the Newton Street apartment in DC. At the time I gave the tallboy, credenza, and bar cart some love: a thorough cleaning, a hit with finish restorer, and a good waxing. The table and chairs I didn’t really touch because I wanted to reupholster the chairs at the same time, but then I never found the time. The upholstery wasn’t the worst, exactly, but the fabric was bleehhh—I imagine it looked grubby even when it was brand new—and lumpy. And the chairs squeaked.

Yesterday seemed like as good a day as any to start, and since I had all of the materials ready to go, start I did. First I unscrewed the seat from the chair and pulled out all the staples to remove the old fabric and foam. Below, on the left, is a picture that kinda shows how lumpy some of the seat edges were. No good! As I pulled out staples I discovered that some of the seats had two layers of fabric and foam, each individually attached. No!! So many staples! So lumpy! I don’t have an upholstery staple remover so I used pliers to remove all the staples. It was tough work. If I do too much more of this I’ll have to get some proper tools! The plywood seats were in pretty rough shape so I gave them a light sanding to remove some of the splinters. (Two of the seat bases are cracked and warped so I need to cut new plywood before I can finish them, bummer.)
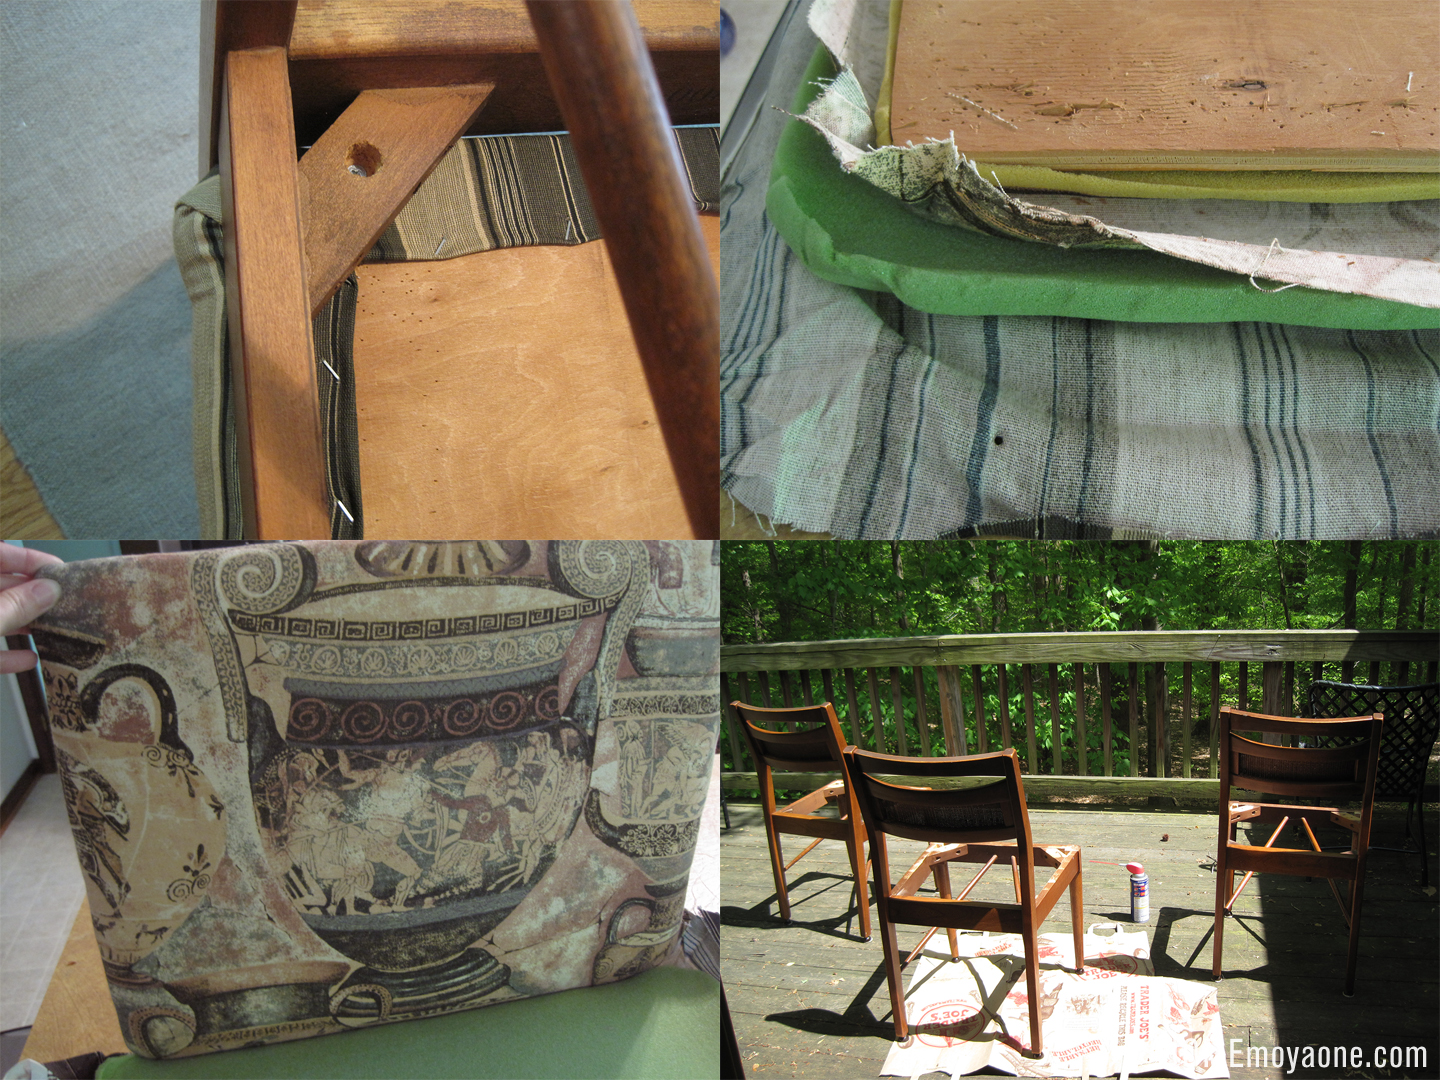
Above on the left is what that second layer of fabric looked like. Très Greco-chic! (Ew.)
During my breaks from removing staples I cleaned up the chairs and gave them my standard quickie spruce up treatment. First I cleaned them with Murphy’s Oil Soap. Then I gave them a coating of Howard Restor-A-Finish which I let sit for a bit then wiped off the excess. The Restor-A-Finish smooths out unevenness in the finish and makes light scratches or dings less noticeable by blending the colors. I use this stuff all the time—it’s great. Then I gooped on some Howard Feed-N-Wax (another product I love), let it absorb, then wiped off the excess. I let the wax harden for a while before giving it a really good buffing.
To address the squeakiness, I sprayed the caster feet with WD-40 and wiggled them around to work it in. After wiping off the feet, the chairs were ready for their new seats, which I was working on inside at the same time.

I used Poly-Fil NU-Foam 1″ thick “densified polyester batting” for the seat cushion. Using the plywood seat base as a template, I traced the shape onto the NU-Foam and cut it out with scissors. Just a couple of notes about this foam: it comes in thicknesses up to 4″ but I don’t think scissors would work on any that are thicker than 1″, you’d likely have to use a utility knife or saw. Also, the 1″ makes for a very firm seat cushion. I happen to like a firm seat, and the aesthetics of the thin cushion, but you might like something with more cush.
I then attached the foam to the plywood with Super 77 Spray Adhesive. This stuff can attach anything to everything—be careful and use old newspaper or what-have-you underneath to catch the overspray—and it’s amazing. The smell reminds me of design school and makes me nostalgic for all-nighters. (Not serious.)
I cut a piece of batting (Warm & Natural Cotton Batting) and a piece of upholstery fabric (Knoll “Venue” in the Riverbank color) about 4″ wider all around than the size of the seat base. I made sure these were both completely smooth then set the plywood seat base on top of them, foam side down, in the center. Starting in the middle on one side, I wrapped the batting and fabric over the plywood/foam, and folded the ends under about 1/2″ or so, then stapled both to the plywood. I used an old staple gun I’ve had for about 10 years (a manual Surebonder), but like staple removers, there are upholstery-specific staple guns and I’m seriously considering investing in one.
After putting in a staple on one side, I pulled the fabric taut (but not too tight) and put in a staple on the opposite side. Then I stapled the other two sides (like the picture below, on the left). I checked that the fabric was smooth on the top and that the subtle striped texture of my fabric was straight. If you upholster with a patterned fabric, checking the alignment would be very important here.

I then worked my way around, adding a couple of staples to a side, then a couple to the opposite side, all the while pulling the fabric taut and smooth and folding the fabric ends under, until I reached the corners. I then hammered down all the staples that were only partly embedded. At the corners I cut out a square of fabric and batting to remove some bulk (being careful to not cut too much away) then pulled the fabric in around the curved corner of my seat base and put in a staple at the corner. I hammered this staple flat, then wrapped the ends like a present and added more staples. Three more corners, and one seat done!
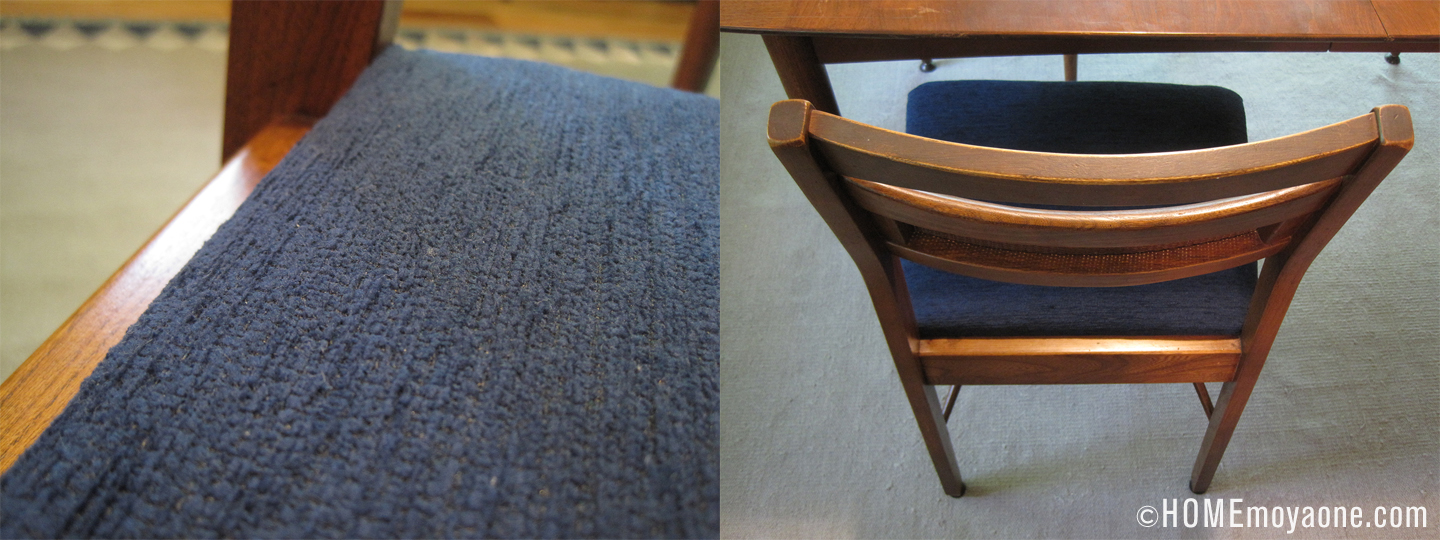
I then screwed the freshly-upholstered seat back onto the chair and—TA-DA!

The texture of the Venue fabric is beautiful—subtle and classy—and the Riverbank color looks great against the reddish tones of the wood. It also matches the blue triangles in the dining room rug, which wasn’t a determining factor in the fabric selection, but certainly nice!
Unfortunately I hit that small road bump with two of the side chairs (cracked seat bases), and I still need to do the two arm chairs, but these two are completely done and looking handsome.

When the entire set is done there will be a full reveal!

Thoughts?