This is going to be a LONG post because a lot has happened in the past two weeks.
Pour yourself a drink….
The background: Immediately after moving in we tore down the ceiling cabinets on the right side of the kitchen, the ones that awkwardly divided the kitchen and dining room. I wrote about it in my first post here—just over a year ago.
We taped over the holes in the ceiling with painter’s tape and promised to patch them up soon. A year passed, and the kitchen/dining room has looked like this, more or less:

Five holes in the ceiling covered with tape, yes. What those pictures don’t show is how nasty the bottom cabinets were:

(And the floor!—the linoleum edges were peeling up and had been stapled down.)
We scrubbed the upper cabinets and removed the doors (I was convinced that their stink would seep into all of our food), hung some curtains (which I sewed in a frenzy one night when we were having guests over for dinner), and made do with keeping some foodstuffs in the upper cabinets, some foodstuffs in the “mudroom/pantry/laundry/room-where-we-shove-the-mess,” and our dishes spread between our dining room credenza and tallboy and what had once been a pantry closet in the kitchen (its door was broken when we moved in and we had removed it and hung a curtain). The bottom cabinets and drawers were kept mostly empty, aside from the occasional bag of potatoes and the dog and cat food.
Our range worked, technically. The oven door didn’t close properly (the light was always on—which admittedly was convenient for Jamie’s sourdough proofing) and if you let the door go when opening it would crash to the floor. The displays didn’t work. (It took us months to realize that the oven could be turned on if you pushed the correct buttons in the correct order—there just wouldn’t be any visual feedback.) The back element had barely any power; the front was too small for our pans. The grill worked, and made a nice steak (if you propped the heating element up with a rock), but the range had seen better days and frankly, we’d much rather be able to cook with more than one pot at a time.

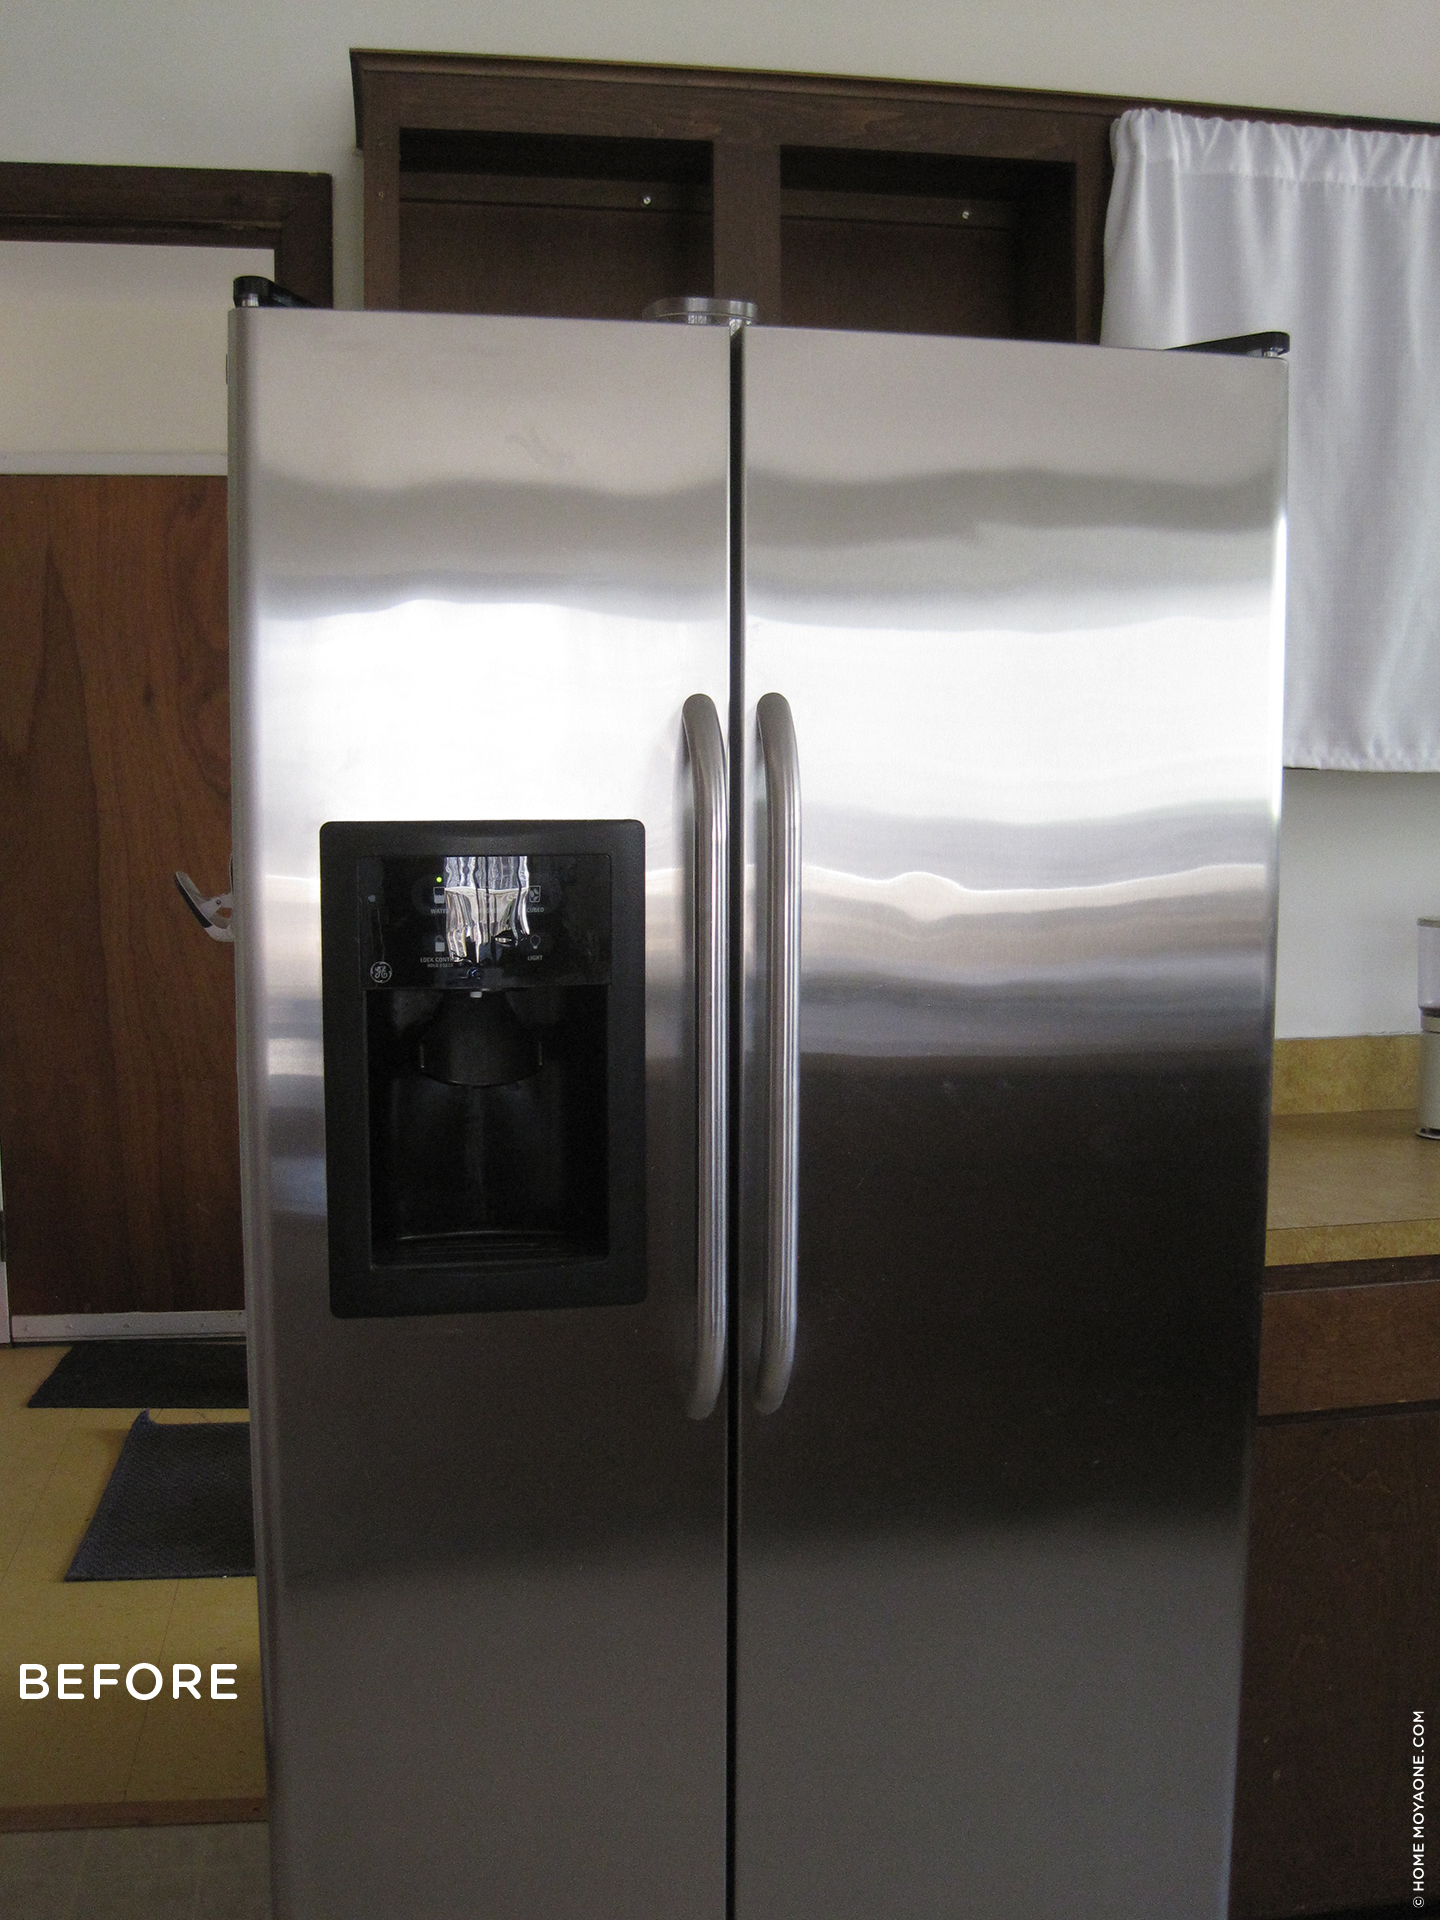
The refrigerator, also, technically worked, but we hated it. The side-by-side configuration meant that everything we put in there would wind up pushed to the back and forgotten (hello, three open jars of tomato paste!). It was loud—sometimes it would sound like there was an arctic wind howling through the house. We had a technician come to check on that but technically nothing was wrong. And to add insult, the stupid thing was too big for the spot it was in, both in depth and width. Ugh. I hated the fridge more than the stove.
So that’s where we were two Tuesdays ago when I got a mid-day text from Jamie: Figure out what you want to do with the kitchen because José’s available next week. One feels a lot of emotions when reading that, mostly panic.
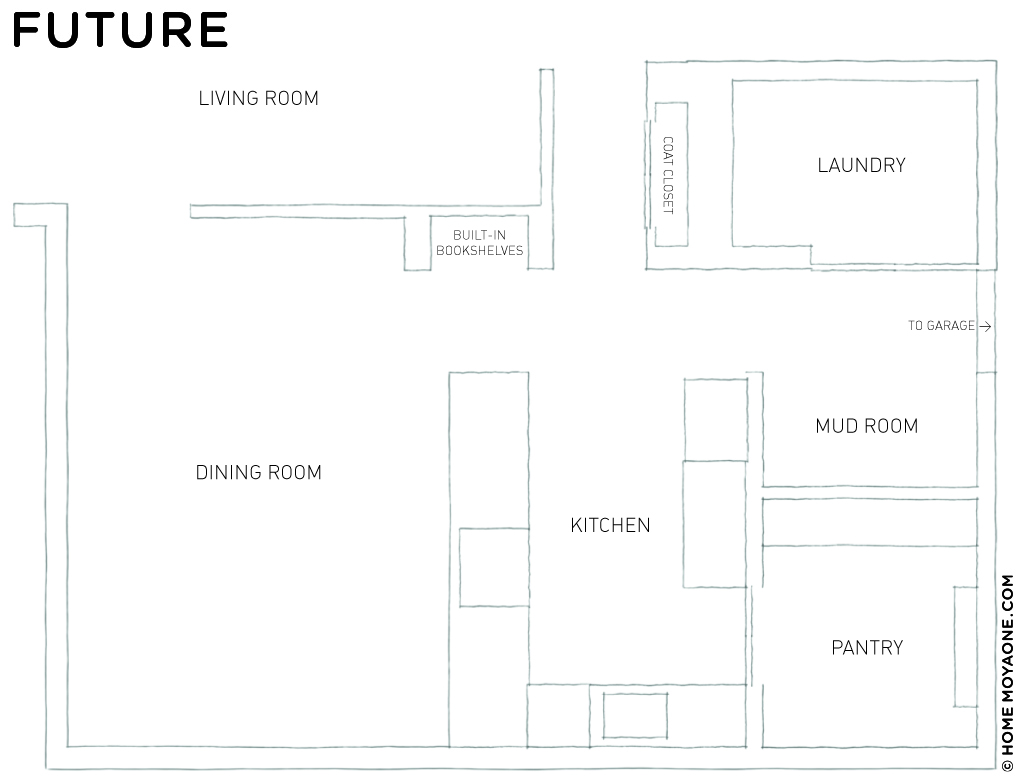
The grand vision for the kitchen involves changing the floor plan: putting a wall up in the mud room/pantry to split it into two rooms—a proper mudroom and a pantry off of the kitchen—and adding a doorway between the kitchen and pantry. The pantry will have a ton of storage—think floor-to-ceiling cabinets—and perhaps a breakfast bar against the big window that’s at the end of the room. My floor plans are very basic, but to give you a sense of the layout:

Exact details are to be determined (we weren’t going to do anything real for another few years), but I know that I want slate flooring, soapstone counters, and medium-toned wood cabinets. (The cabinets, actually, would not be too far from what we have now, just…not disgusting, and with drawers and better organization.) A little style sheet I worked up quickly:

Rather than doing a total overhaul—when we couldn’t justify the expense with all our other current projects (cabinets and slate and soapstone—not to mention weddings—are expensive!), and which we don’t have time for anyway since we had José for only a limited number of days—we decided to focus on simply making the kitchen more usable, and in the process prototype some aspects of the kitchen vision, specifically the slate floors and soapstone counters. We decided to just clean up the cabinets and paint them to make them as nice as possible. (They have solid wood fronts, so made excellent candidates for painting.)

Looking around for a decent slate alternative, I landed on Pergo Monson Slate laminate flooring from Home Depot. It’s well-rated and inexpensive, so I pulled the trigger and ordered 8 cases, crossed my fingers that they would arrive in time (yep—and quickly, phew), and then went off to get a half dozen paint samples to choose a pale gray for the cabinets. I only gave us a day and a night to choose (looking at the color during the daytime and at night with lights on). We decided on Benjamin Moore 1541 “London Fog” and I had it mixed in Behr’s Alkyd Semi-Gloss Enamel. For the “soapstone counters” I’m going to give this DIY trick a try (our counters are garbage, what do we have to lose?)
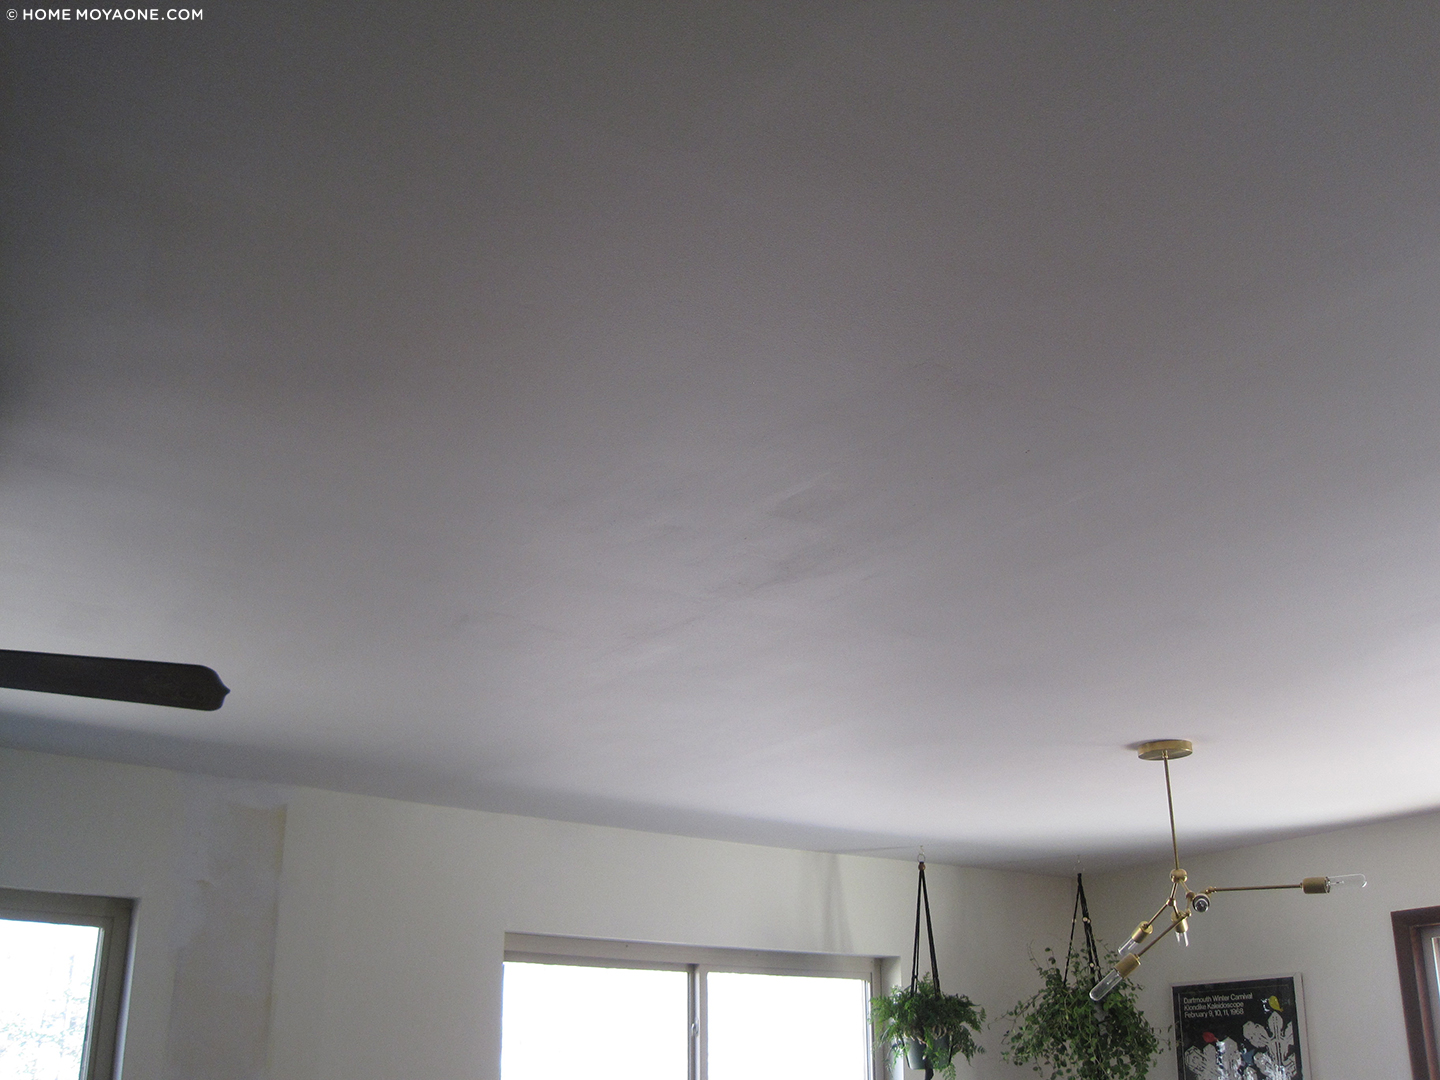
The next day (meaning the Wednesday after I got the “it’s on” text from Jamie), our occasional handy man Gary came in and patched all the ceiling holes and painted the ceiling with Behr Premium Plus Zero-VOC Paint and Primer In One in Flat Ultra White. It’s not perfect but it’s perfectly better than it was!
Meanwhile we had to decide on a new range and a new refrigerator. For the range we wanted a 30″ slide-in with an induction top. That limited us to only three or so choices. (We didn’t want to go with a cooktop because we didn’t want to mess with the cabinets at all.) Our final choice is going to be delivered on Monday, so stay tuned! (It’s a VERY EXCITING story and I want to build up the drama.)
As far as the refrigerator, it HAD to fit within the existing opening and it definitely had to be cabinet-depth. It could possibly be a model with French doors and freezer on the bottom, but what we really wanted was a refrigerator only (and we’d put a chest freezer in the pantry). We didn’t care about having a water dispenser (we have filtered water at the sink), and although losing the ice maker would be sad, it wouldn’t be the end of the world. I researched and researched… “I think we only have one choice…. I’ll look some more.” Oh, and it had to be less than $2,000. I researched and researched…we stopped into showrooms… “I still think we only have one choice… Let me check again.” We did have only one choice, but it met all of our requirements. It too will be delivered on Monday. SO. EXCITING.
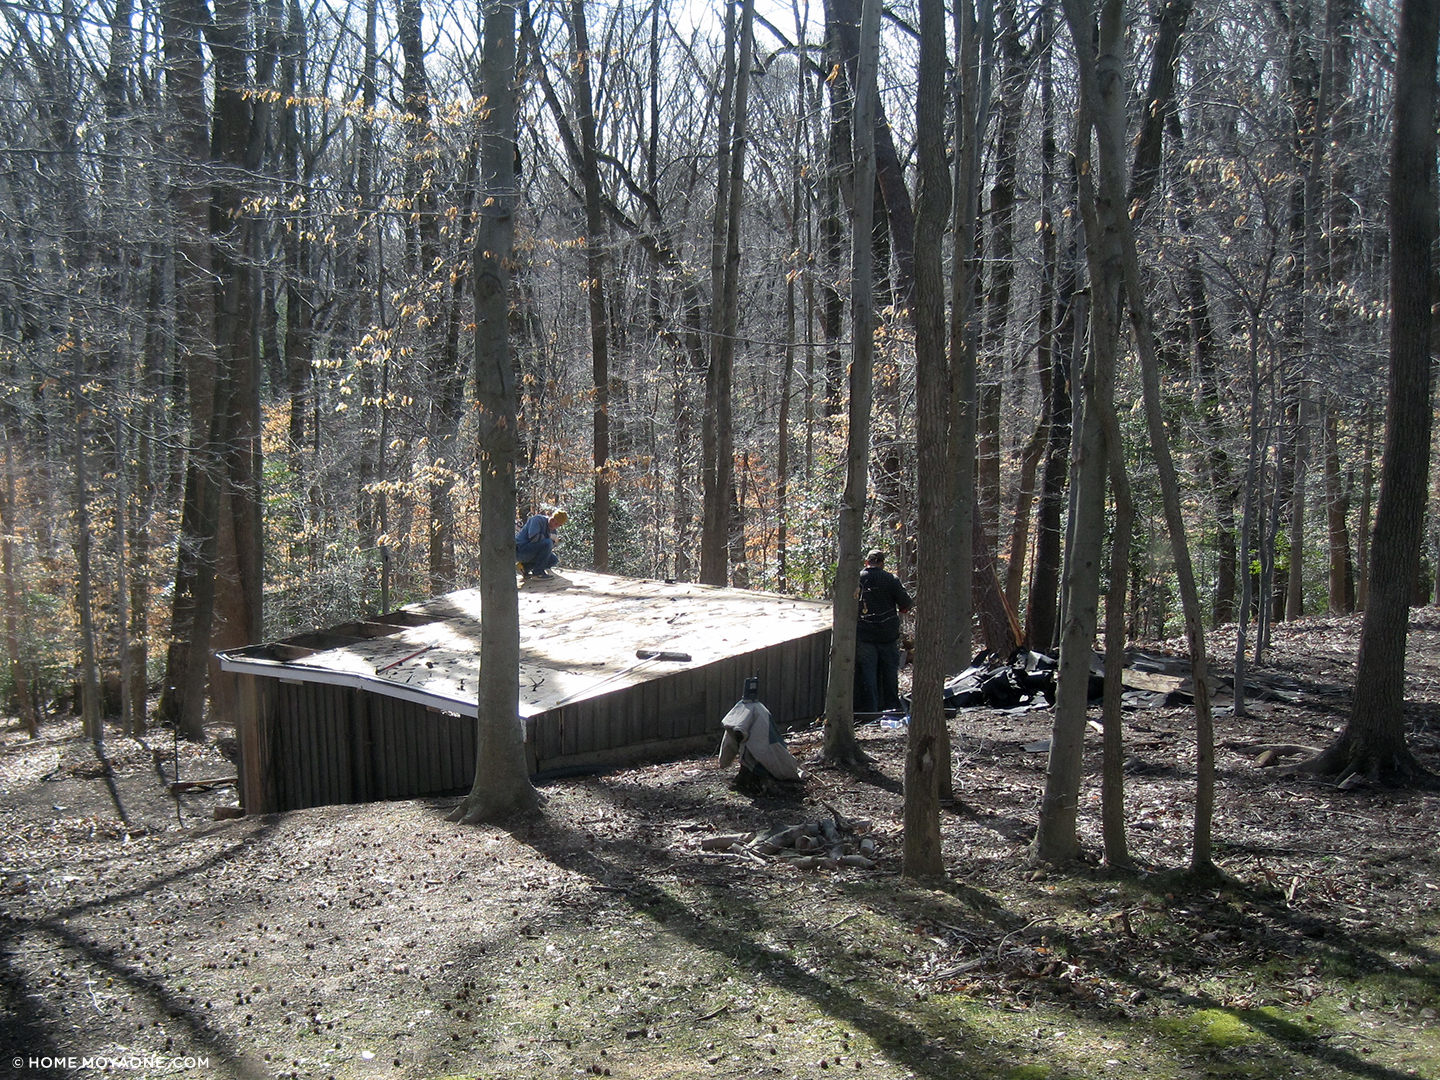
This past Monday José started work. First he shored up and put a new roof on our shed (maybe I should post about that too?)
…then he tore apart our kitchen. All of the cabinet doors came off, everything was sanded and cleaned, drawers were repaired, hinges were cleaned and replaced as needed, and a coat of primer and a coat of paint went on.
The plan with the floor was to put the new floating laminate tiles directly over the existing floor. But there was a little problem with an odd bulge that ran along the length of the kitchen. The floor was checked from the basement, but all the floor joists looked good. A second theory was that there was a row of tiles below the laminate floor that hadn’t been pulled up before laying down the laminate (perhaps it went under the stove and they didn’t want to deal with that?). The laminate came up…but there was no smoking gun row of tiles.

But what tiles they were!! If José hadn’t already begun to dig down to the next level I would have been tempted to say “screw the slate, let’s go orange.”

And there was our problem. The floor joists run in one direction below the kitchen, and in the perpendicular direction below the dining room. Here’s where they meet. José has a plan for leveling this. We should also have substantially less squeaky floors when all this is done.
So here we are now, flooring gone, stove gone, and cabinets painted:

Another thing we asked José to do was turn the closet in the kitchen into built-in bookshelves. This was another project that didn’t go simply, as planned, but is better for it. A before picture and where we are now:

I wanted this to be a built-in bookshelf nook for our pretty sizable cookbook collection, with clean edges—no molding. I really, really, really hated the molding on the closet. It didn’t align with the door to the right, it was too much molding too close together… And because the footprint of this closet/nook opening affected the flooring, we decided to address it now.
I had originally wanted the front face of the closet to be cut out to the inner dimensions, and open to the ceiling (if that doesn’t make sense…it doesn’t really matter). But turns out there’s a support beam above the closet, and pretty chunky framing that appeared to be structural…so instead, José built the wall out to the dimensions of the opening, and in the process put in strategic studs for shelving. I’m already so much happier with it! (And Broccoli too—he had a tough day of supervising from his bed.)
The work continues tomorrow…

5 Responses to The kitchen’s all torn up (but even so I think it looks better)
Can’t wait for next week’s installment!
So exciting! I just signed up for your blog (newsletter?) and am happily following along on your kitchen reno. Your orange floor made me nostalgic for what we use to have, lol. The kitchen is the last room in our house (mostly) that we need to re-do. We use to have a lovely orange and gold linoleum as well. You have given me hope though, that we can tackle this maybe bit by bit. Our renos seem to take on a life of their own and take over our house and the kitchen has been giving me nightmares as to how long it will take and the dust I will live under. We need to take down some cabinets into DR as well so maybe that is the first baby step. Can’t wait to see what you do next. Wow—funny—never thought there would be a day I would get so excited about home demolition and reno, lol.
Hi Taya! Take the baby step!
Ha! Christine, I will have to vicariously live through your kitchen reno for now. After discussing with my hubby he thinks when we do it we will do it all in one fell swoop, no baby steps for him. I think this is ludicrous, but I won’t be really “doing” any of the work I guess. Maybe helping with some demo and handing tools. Here is his POV, which is valid to an extent, he doesn’t want to do half and then not be able to “match” the other half in terms of cabinets/counters/etc when we get to the next half (and we don’t really have anywhere to store half a kitchen worth of cabinets/counters etc in the meantime). Anyway, I am anxiously awaiting your next moves, lol…. carry on, at least one of us is making progress!!!! :-)
Great post! Looking forward to seeing the results in May!